Configuration → Job Testing
Job Testing
The purpose of this screen is to test whether the configured job is ready to run its process successfully (Fig. 1).

[Fig. 1]
Run Test
- Choose the Job ID or Job Name from the Choose Job ID / Job Name field. Alternatively, you may click on the Browse button to locate a file (previously saved job) within your system to bring it back into the RoboDX™ application.
- Click on the Run Test button. Depending on the file size and/or the complexity of the workflow for this job, it may take a few minutes. A progress bar, as seen in Fig. 2 below should appear if the load is a slow one.

[Fig. 2]
Failed Test
- If your job is not set up properly, the Run Test functionality will provide a table for the reason(s) as seen in Fig. 3. Note the addition of two buttons:
- Button [Click to Download]: Once a Run Test job process is completed, the user has the option to download files by clicking on the Click to Download button.
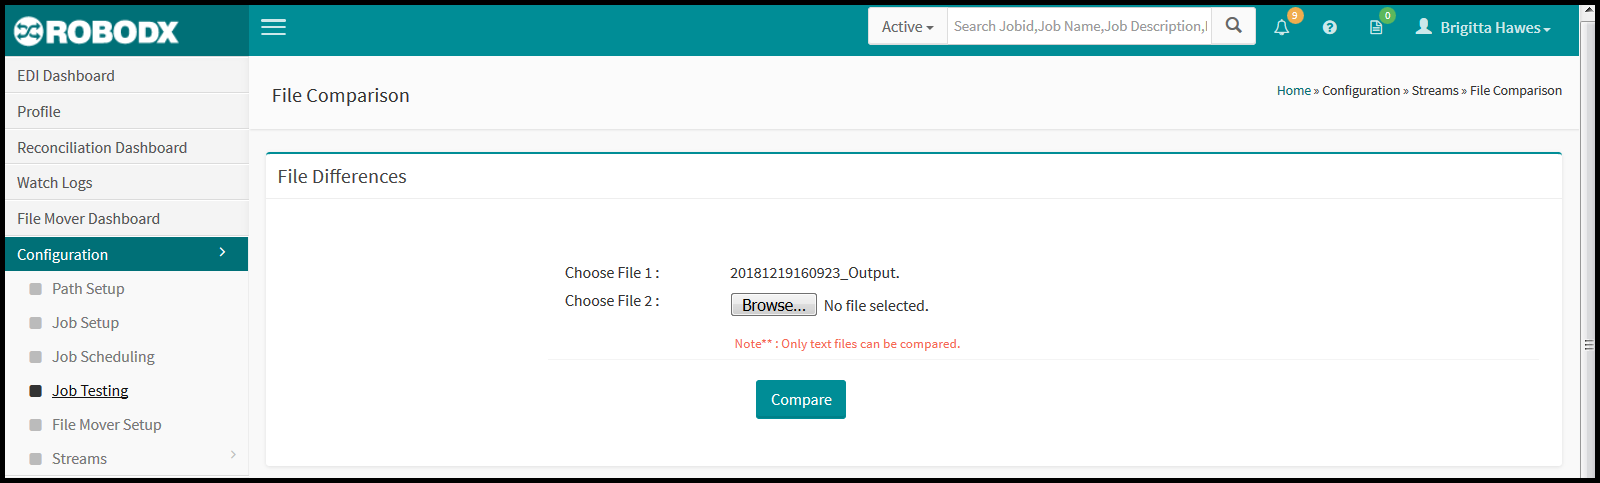
- Button [Click to File Compare]: When the user clicks on the Click to File Compare button, a comparison of the processed files, with actual output, will be shown (Fig. 4).
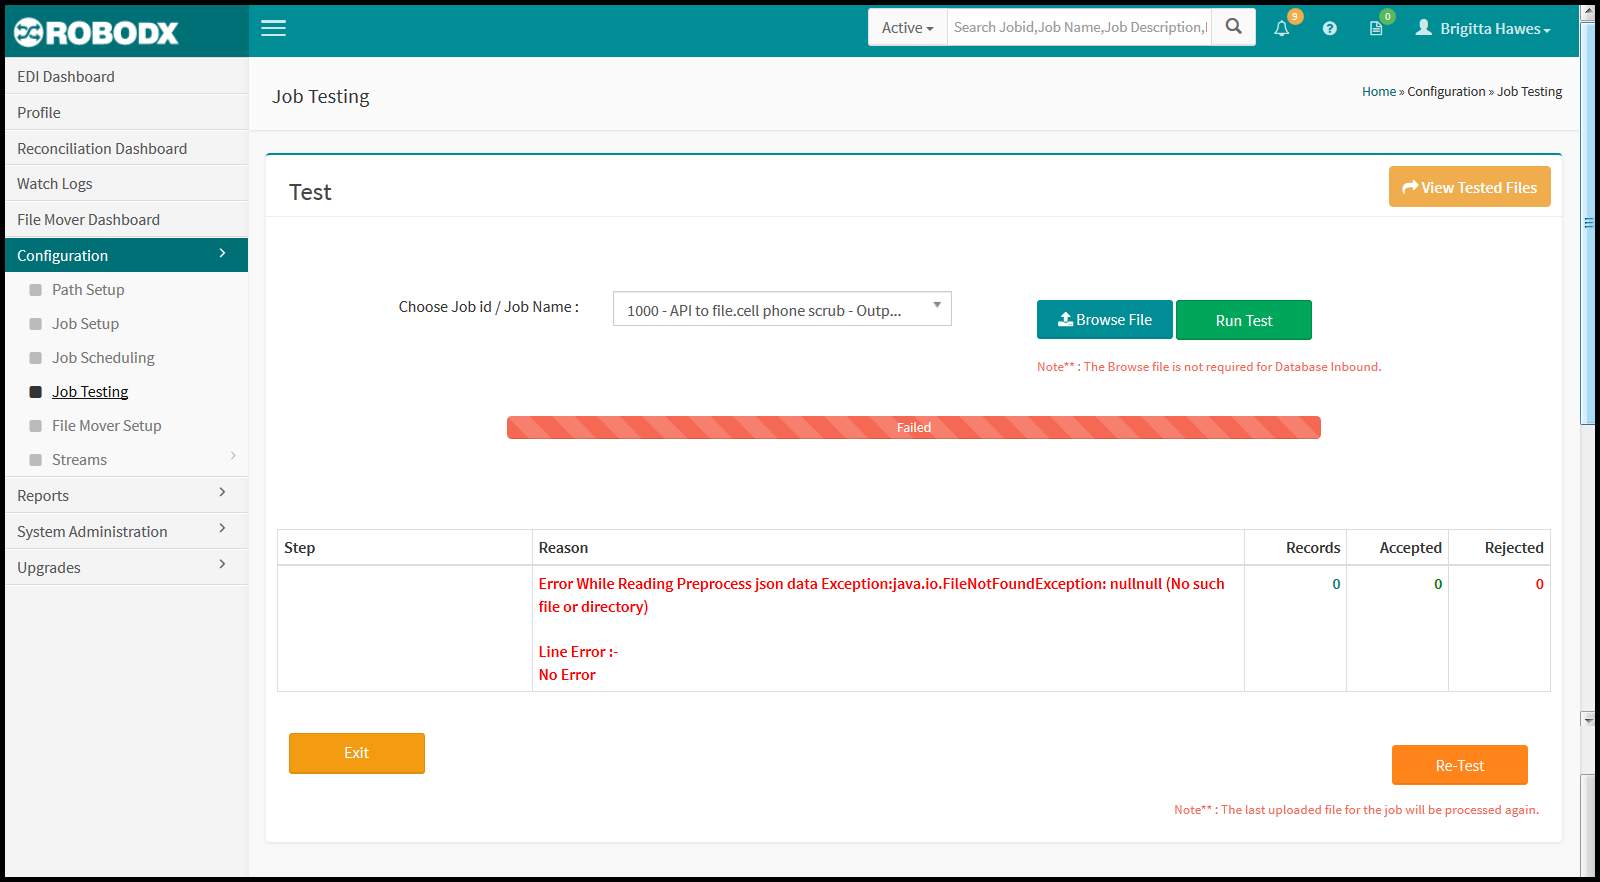
[Fig. 3]
[Fig. 4]
Field Definitions
- Button [View Tested Files]: When the View Tested Files button is clicked on, a history of perviously tested files will appear.
- Choose Job ID / Job Name: The user will need to choose the Job ID/Job Name from the drop down list of existing jobs. The selections will show the job properties such as: File Name, Delimiter Encloser and Extension.
- Button [Browse File]: The user will then want to click the Browse File button to upload the file.
- Button [Run Test]: Finally, clicking on the Run Test button, will initiate the job process, as shown in the below screenshot. A progress bar will appear showing the processing status of the test.
- Button [Exit]: Cliecking on the Exit button will redirect you to the Job Setup screen.
- Button [Re-Test]: To run the same job, with the same files, multiple times, the user can click on the Re-Test button.
View Tested Files
- Click on the View Tested Files button located in the upper-right corner of the screen. The Tested File List table appears (Fig. 5).
- By default, the listing showing in the table are for the current day. Click within the Process Date field to select a different day or date range.
- In the left calendar, select the From date. In the right calendar, select the To date.
- Note: If you want to select a single day, select the same day from both the left and right calendars.
- Click on the Apply button to confirm your date, or date range. The calendar box will close. Alternatively, click on the Cancel button to exit the calendar pop up (no date or date range will be saved). Table results will populate based on your Process Date input selection.
Columnar Definitions
- #: Refers to the row number.
- Test Date: Date the job was tested.
- Description: Refers to the job description.
- In File: File(s) received by the job.
- Out File: File(s) sent by the job.
- Comparison: Refers to whether a file was compared after a test.

[Fig. 5]