Configuration | Streams → Discrepancy Files
Discrepancy Files
The Discrepancy Files screen allows the user to view mismatched files. Mismatched files are grouped by path. If a file isn't matched up with a job, it is referred to as a "mismatched file". If a mismatch is found, it will display in this table with the total count of files in the path.
Other Reasons Files Will Appear In Discrepancy Files Table:
In addition to files listed here because they are not associated with a job, there are three other reasons that files could appear in this screen. They are:
- Waiting for Approval: All files that are Waiting for Approval will appear in this screen.
- File Name Duplicate: Any inbound files with a name that exactly matches a previously processed file.
- 1-Job-a-Day: Any inbound files associated with a job setup allowing only one job per day.

[Fig. 1]
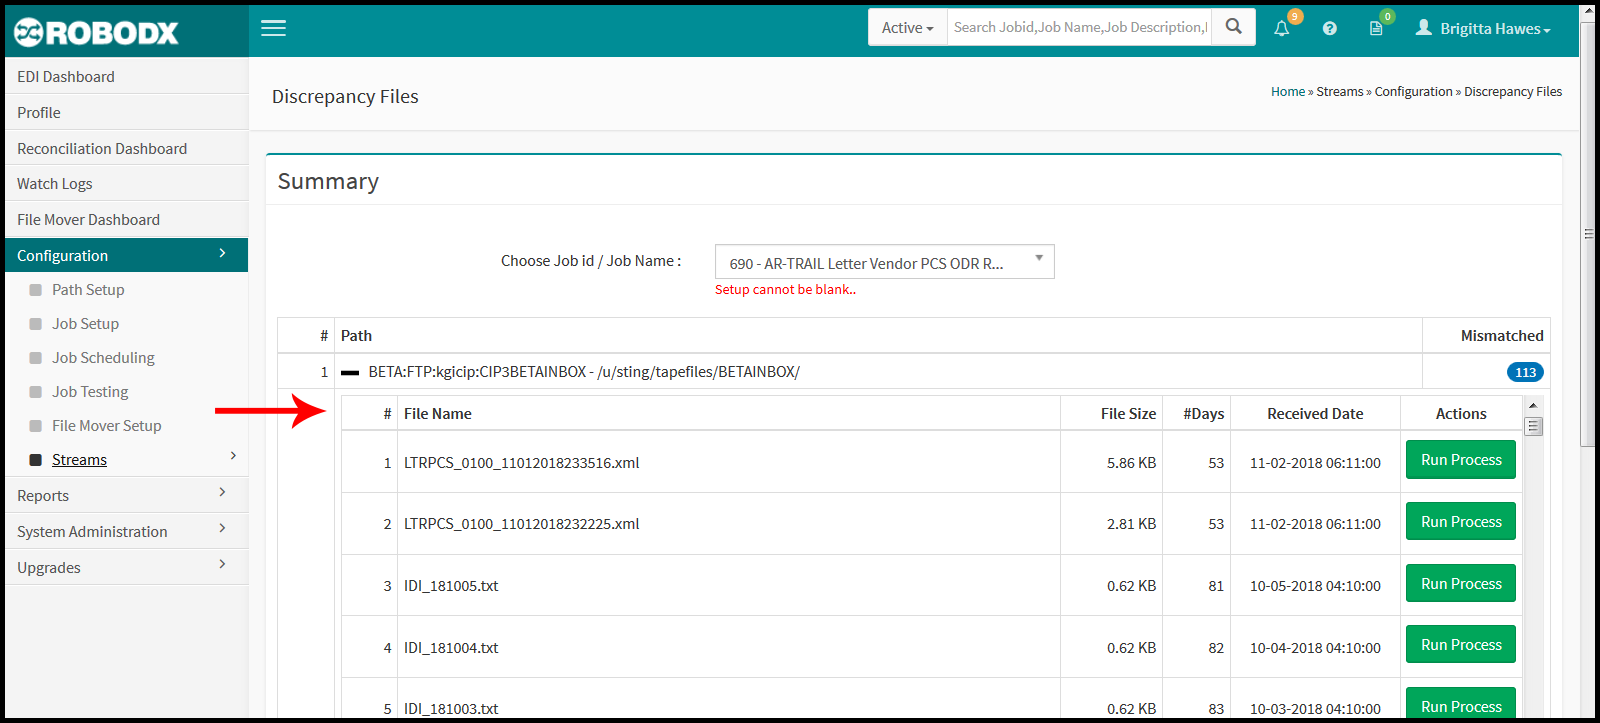
Viewing Mismatched Files
-
Upon page load, the Summary table for mismatched files appears (Fig. 1). This table will list any paths that contain a mismatched file(s). The columnar definitions for this table are as follows:
- #: Refers to the row number of the table.
- Path: Refers to the name of the path.
- Mismatched: Refers to the number of files in that path that have been marked as "mismatched".
-
To view a path's listings of mismatched files, click on the expand icon, to the left of the path name, for the row you wish to view. A drill down table appears. The files in this drill-down table represent the mismatched files for that path. The columnar definitions for this table are as follows:
- File Name: Shows mismatched file name.
- File Size: Shows the file size.
- Days: Shows the number of days that the file has been present.
- Received Date: Shows the actual date the file was placed.
- Action: A user can process a discrepancy by choosing the job within the drop-down section and clicking on the Run Process button.
[Fig. 2]
Process the File
In order to remove a mismatched file for this table, you will need to first assign it to a job, and then process it.
- Click within the Choose Job ID/Job Name field and select the job you wish to attach a file to.
- Click on the Run Process button, in the Action column for the row you wish to process under the job you just selected.
- An Alert popup appears asking you to confirm the job process.
- Click on the Yes button to process the job.
- Click on the No button to exit the popup (no processing will take place).
- If the Run Process is successful, a message will display stating: “Job run successfully”. If the Run Process fails, a message will display stating: “Job processed failed. If you receive a message that the processing failed, check for the reason in the Watch Logs screen.”